

March 27 2005
 |
 |
I hope you will understand all the writings in my horrible English. :)
Few years ago we control the lights in the garden with a automatic-timer-switch, very nice but when the evening gets longer or shorter we had to adapt the timer each week. In that time I came in contact with programming microprocessors so my first project was born. The first garden timer was a simple 1 output. The timing was controlled by the PIC and every month I had to change the minutes. So back to the table and design the second garden timer able to control 3 relays - left, mid and right side of the garden. It provided also 4 modes: – always off – always on – from dusk to dawn – from dusk to timer and the timing was dedicated to a RTC DS1307. The garden timer runs now over 1 years without any problem, but my wife wanted to have a waterfall in the garden, so we made a waterfall and of course a water pump was installed! So we had to put on and off the water pump manually. Back to basic again…Time to design the third garden timer with 4 relays, 3 relays to control the lights and 1 relay to control the water pump and all settings controlled by the remote. I made an happy man too. The old garden timer hang over there.
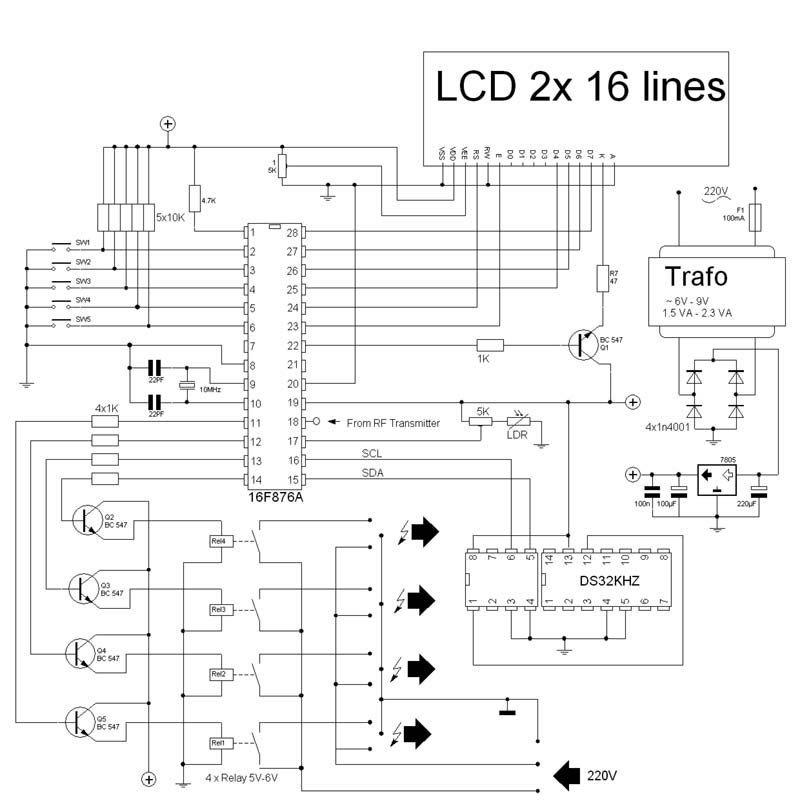 |
Schematic of the Garden Timer version 3.0
Functions of the Buttons:
Button 1 : Mode 1 relays always off – Mode 2 Relays always on – Mode 3 from dusk to dawn – Mode 4 from dusk to timer
Button 2 : Settings – normal operation - set Clock – set Alarm1 – set Alarm2 - set Relay Delay in mode 3 & 4 – set Separate control relays – set Hardware address remote – set Clear Eeprom
Button 3 : In normal operation turn on backlight – Change value
Button 4 : Change value
Button 5 : switch relay 4
The backlight can be turn-on on all buttons a timer switch it off after 15 sec, when you press a button before the timer switch it off the timer starts over. Only button 3 will turn on the backlight in normal operation without effect on the operation. By switching between modes it waits 5 sec before that mode come active. When you change the mode before it come active the timer starts over.
In all modes Relay 4 can turn on/off and automatic turn off by Alarm2.
In mode 1 Relay 1/2/3 are off and stay off . In mode 2 Relays 1/2/3 goes on and stay on.
In mode 1 & 2 the LDR is not active.
In mode 3 & 4 there is a delay to turn on/off the relays 1/2/3. When it get dark the LDR go low, when it on a barrier the relays will be turn on&off the delay is pretended for that barrier.
Only in mode 4 by turning off with Alarm1 the delay will not work.
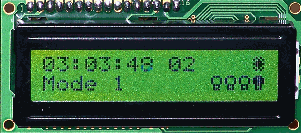 |
First line, Time, Delay, Status from the LDR
Second line, Mode, Status from the relays 1..4 (Relay 1/2/3 are off Relay 4 is on)
Press button 2 to go to first field of the settings
 |
Set up the clock
Change hour with button 3
Change minute with button 4
Press button 2 again to go the next field
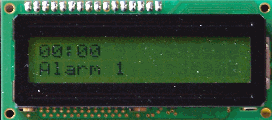 |
The 2 next fields are the alarm timers for relay 1/2/3 and 4
Set up alarm1 & 2
Change hour with button 3
Change minute with button 4
Press button 1 or 2 to go the next field
 |
Set up the Delay
Change minute with button 4
Press button 2 to go to the next field
 |
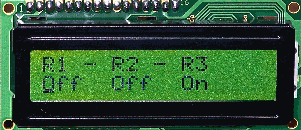
Set up the separate relays that will go on when R1 = off it stay off in all modes
Press button 3 to switch to next value
Change value with button 4 Press button 2 to go to the next field
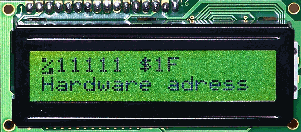 |
Setup the hardware address for the remote controller
Press button 3 to switch to next value
Change value from 1 to 0 with button 4
Press button 2 to go to the next field
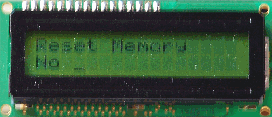 |
Reset the Eeprom from 16F876A to start as first time
Change value with button 4 - Press button 2 to reset – switch the power
Press button 2 to go to normal operation
Schematic of the Garden Remote controller
You can control with the remote in the first place Relay 4 on/off but also all the other options from the Garden Timer. It has a power down function, after 20 sec when you press a button it will go to sleep and wait till you press Button 5 or 6. With button 5 relay 4 will switch with button 6 only the remote will come to live You can not power it up with button 1..4. PortB interrupt change. When power-up the led will flicker 3 times in 5 sec.
Files can be downloaded HERE
(Last revision OdB 31-03-2005)
Crownhill's Proton Plus Compiler is a part of the Proton Development Suite - A suite of British-developed applications enabling fast development of PICmicro's using the PICBASIC Language.
For more information on the Proton Development Suite, please visit www.picbasic.org
Please note that this project is published AS IS. No responsibility of the author in any cases can be invoqued. This project is for learning and entertainment purpose only. No vital application can be connected to it. As this project is published on a free and friendly base for the user site of PROTON +, it cannot be used in any condition for business or commercial use without explicit permission of the author.